To add a pop up:
- Hover over “/Home” on the left side of the top toolbar and click on "Add a Popup".
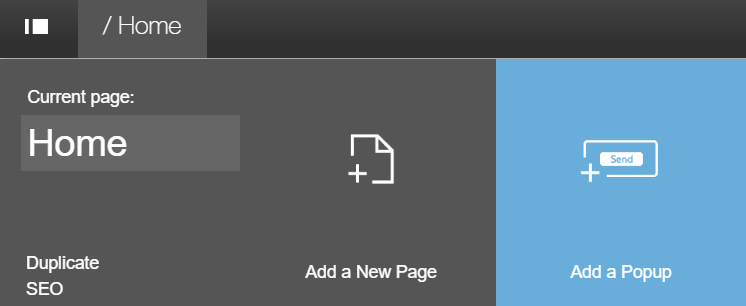
- The pop up will appear along with a dashboard where you can configure the popup.
Popup Settings
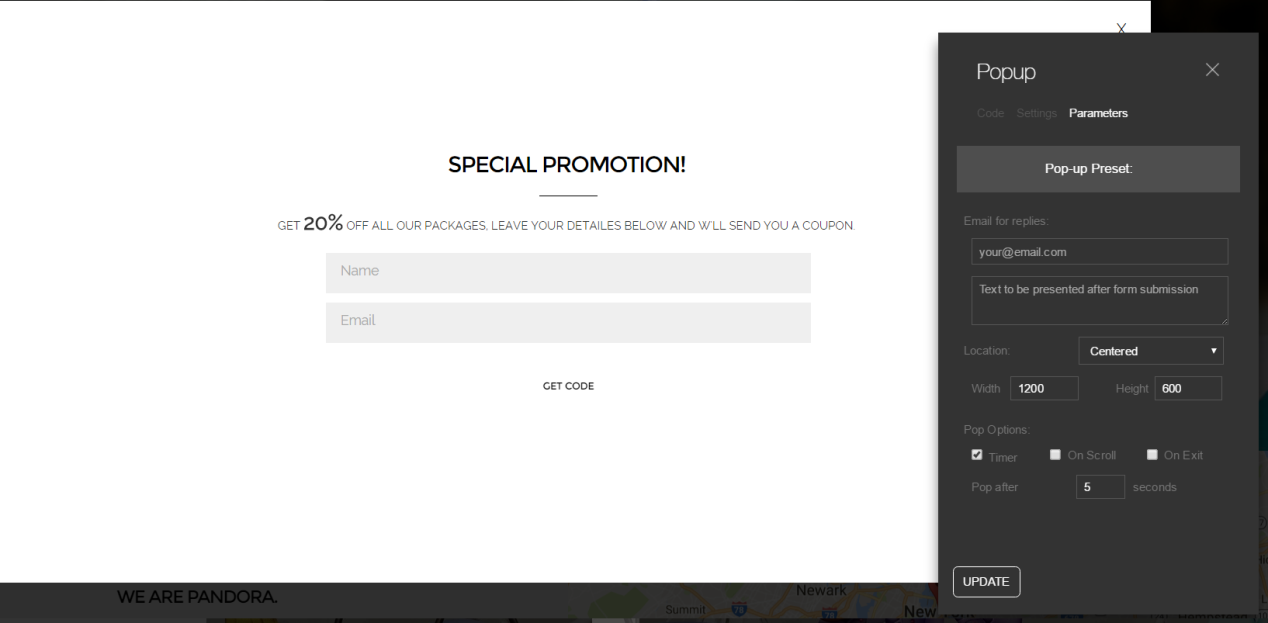
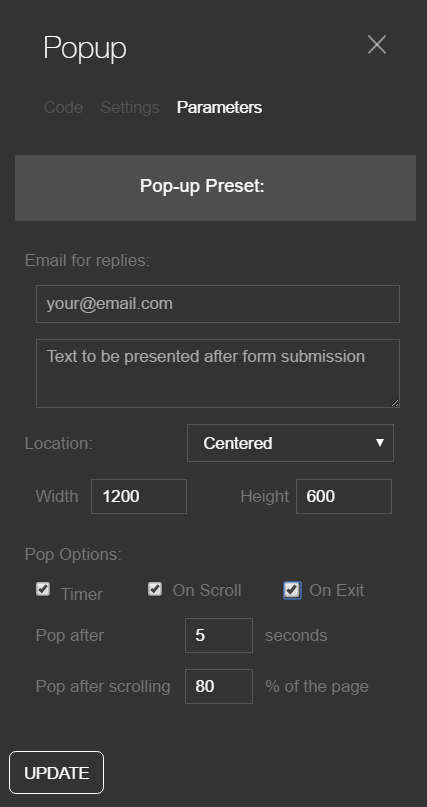
1. Parameter tab:
- click on Pop-up Preset to choose one of the many pop-up styles.
- Email For replies: Here you can set an email to which you would like to receive subscribers info. You can also add a text to be displayed after a user submits a form.
- you can also determine the Location, Width and Height of the popup.
- Pop options: You can choose all 3 options to set the stage/time at which the popup should appear on the users’ screen.

2. Settings tab:
- Here you can choose the a layout and control the background color and padding.
3. Code tab:
- you can edit and add raw HTML code.
Adding/ Editing the Popup
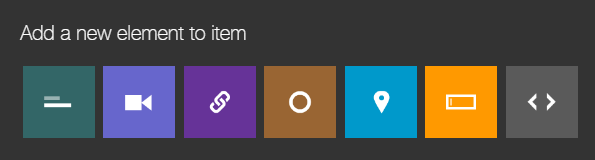
You can add and/or edit the elements of the popup easily:
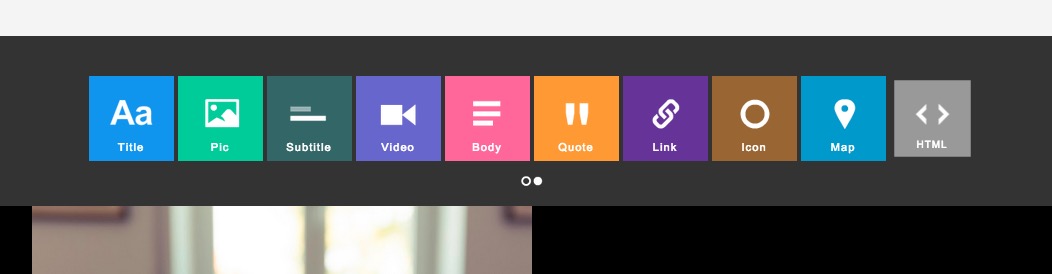
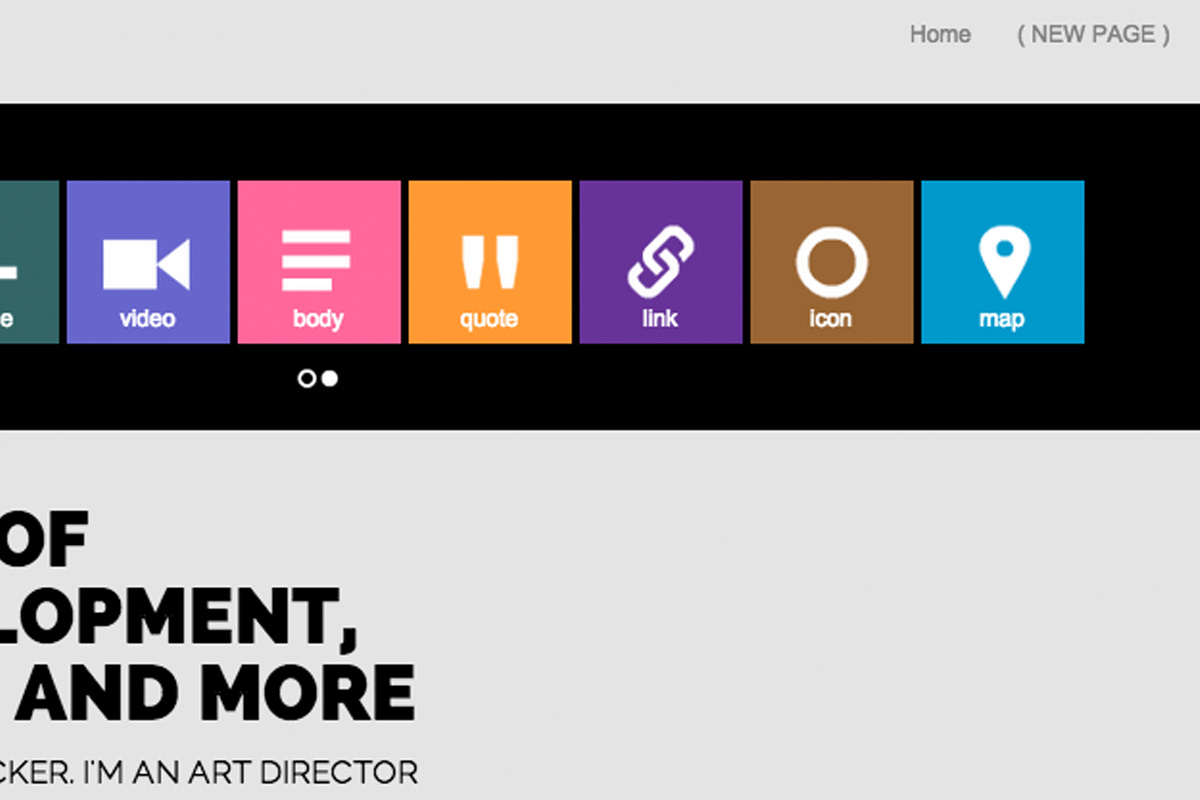
- To add an element click on the grey “+” button ( ); You can add new fields, buttons, text, map, video and raw code through the following window below:
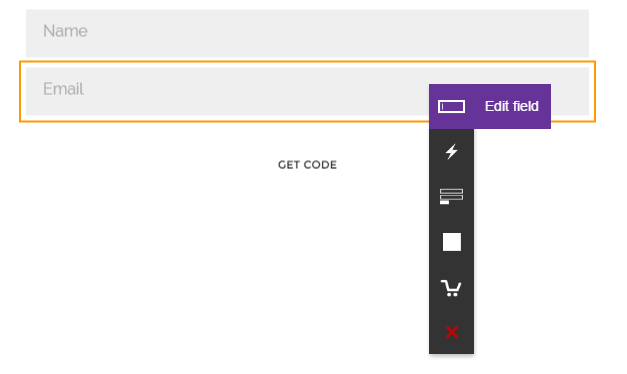
- To edit or delete existing popup elements, hover and click over the chosen element and choose an action from the menu below (each element will display a different menu, based on its functionality):
1. you can change the type of field by clicking on “Edit field” and choosing the name and type of field you want:

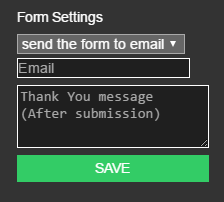
2. click on a field to aslo edit the form settings; here you can:
- update an email to which the completed forms will be sent to.
- add a “Thank you” message that will apper after a user submits the form.
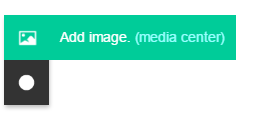
3. To change the background of the popup click on the background. On the menu that appears, click “Add image” to select a pic from a local folder. Click on “media center” to choose one out of our wide selection of photos. You can search for a keyword to find a particular image.
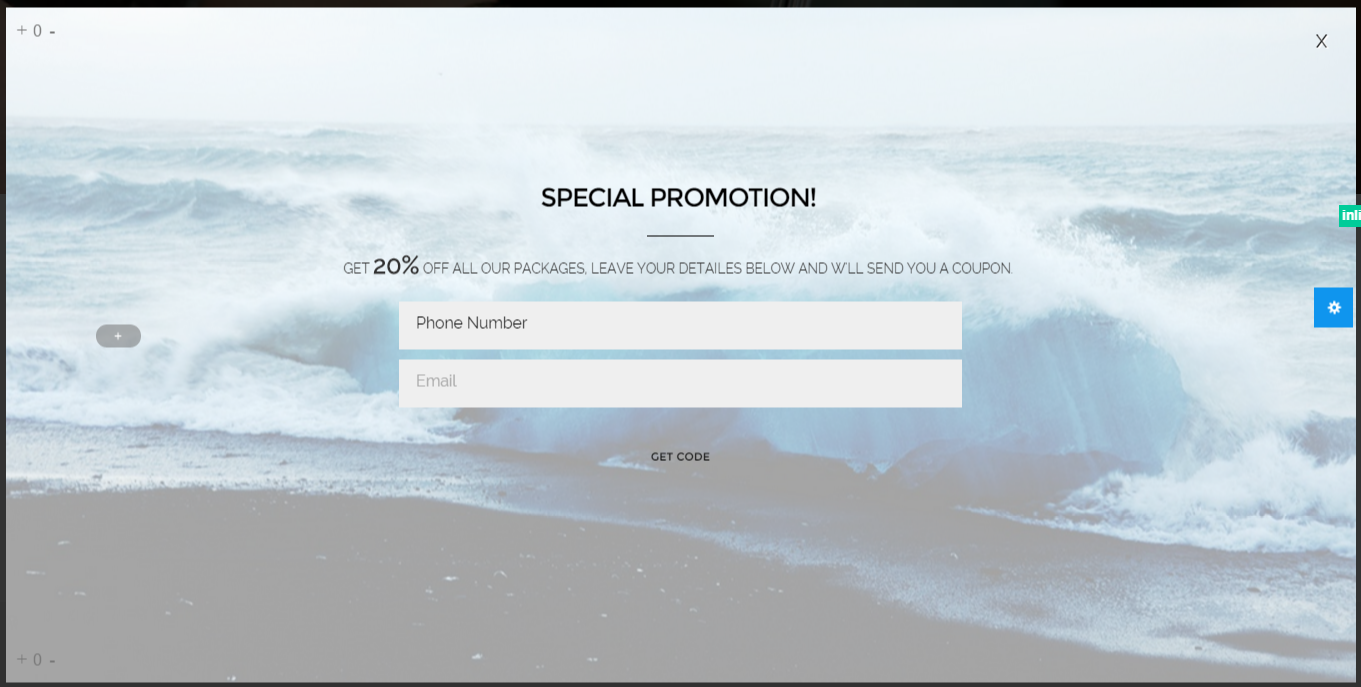
That’s it! your Popup should be set.
Good luck :)
Adding a map to the Page
To add a map to your page:
- Click on the blue "+" sign to add a new section.
- Click on "Maps" and browse using the arrows to select your preferred map style. Click the green "+" to add the map to your page.
- Left-clicking the map will open the map toolbar which you can use edit the map and change its setting:
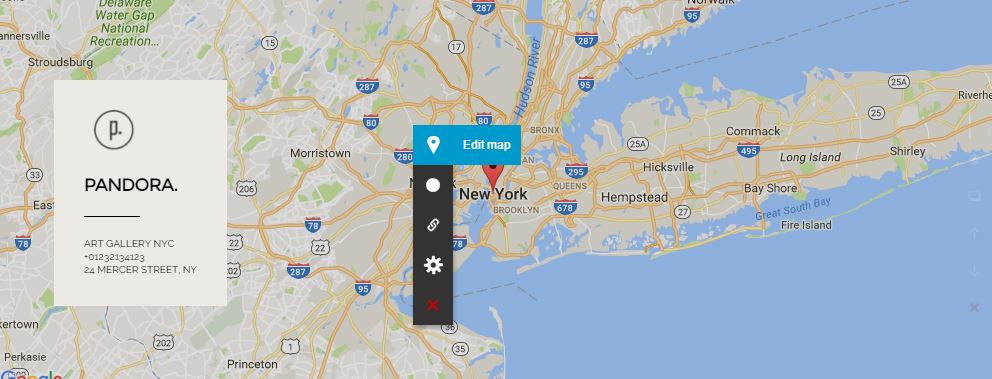
- By clicking on "Edit map", you can change the map style and the address you would like to display:
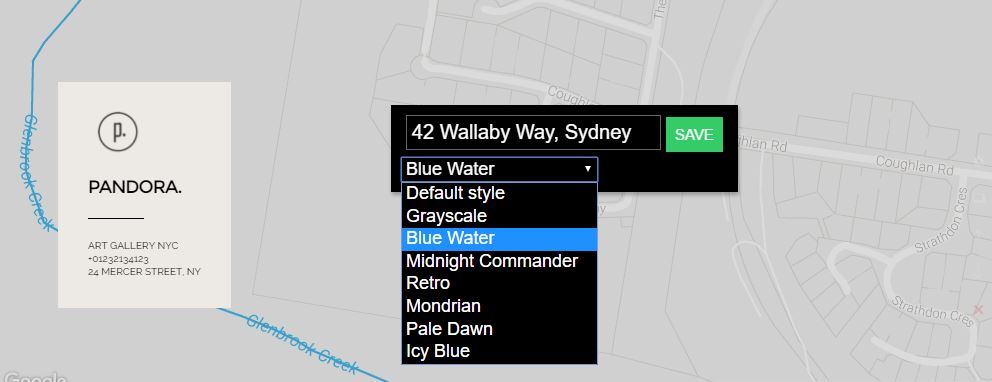 You can change the maps' color schemes and display settings.
 - Using the map as a link can be done through the "Go to" tab.
- Accessing the map section settings can also be done through the map menu
And you got yourself a map :)
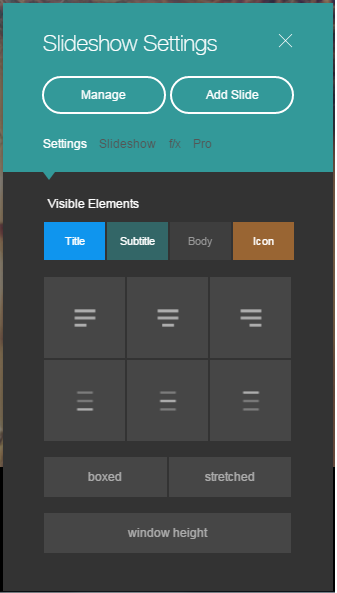
Adding Slides & Images To Slideshow
To add more slides, mouse-over the slideshow stripe, and click the gear button to enter the slideshow settings panel:

Than click 'Add Slide' on the top right to add a new slide, or 'Manage' to remove and reorder slides.
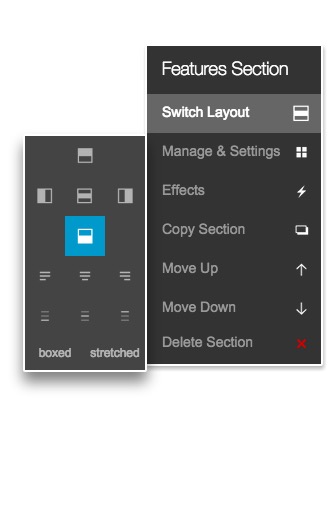
Change the position of elements
In order to keep the awesome responsiveness of WeBee websites we don't let you move elements wherever you like (trust us, we tried that).
Instead, you have 2 ways moving elements around. These 2 options should make it easy to place the elements however you like:
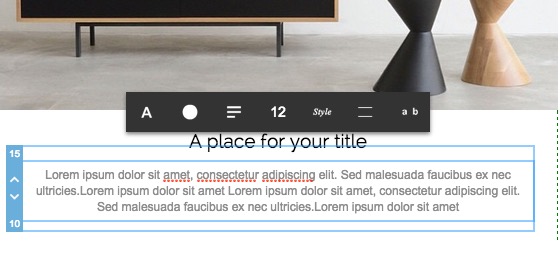
1) Change order of elements. Double click the text to edit it and move it around with the arrows on the left
2) Use the 'Switch layouts' option on the right side menu of the stripe
Add HTML code to your website
To add a HTML element, click the '+' sign, which is located between the stripes:

On the last tab 'Elements', you can find the HTML or Raw elements.

That's it.
Adding Twitter feed to your website
In order to embed a twitter feed to your WeBee website you first need to create a widget on twitter.
Go here: https://twitter.com/settings/widgets
Click 'Create new', and run through the configuration settings. When you're done hit 'Create Widget'.
You'll then see a new box with HTML code in it:

Copy that code, and go to your WeBee website.
Click the '+' button found between the stripes and add a new HTML stripe:
Delete the code that's is currently in the HTML stripe, and paste the code you copied from twitter.
Adding a Map Stripe
You can display the location of your business or office in your website by using the Map Stripe.
To add a Map:
1. Click on the "+" sign and choose "map"
A default map will appear.
2. To change the default location of the map and add yours, left click the map and choose Edit Map.

3. Insert the address of your business or office to set the map's location.
4. You can also choose the map's style - default, grayscale, blue water etc.
5. Click Save.
That's it.