Publishing your site is a simple process.
Hover over the right corner of the Top Toolbar:

Next, choose one of the options: would you like a temp URL for your site? Do you have an existing domain you wish to connect to? Or maybe you want to buy a new domain?
Click on the option of your choice, and move on to the next step:
selecting the type of license you want.

Fill in your payment details and click Continue, to connect your domain and then publish your site.
SEO
As a rule, WeBee sites enjoy great visibility and an excellent reputation on search engines.
You can set up your own SEO options:
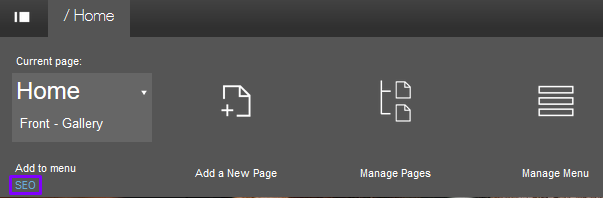
Hover above Home in the left corner of the Top Toolbar and click SEO, at the bottom left.
You will be taken to this screen:
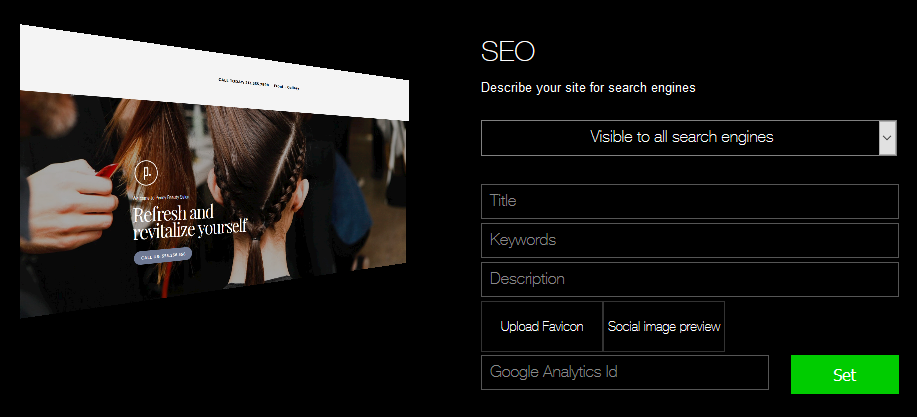
Here, you can describe your site and choose how it will appear in search engines.
Enter your site’s title, the relevant keywords and a short description of what it’s about.
You can also upload a favicon and a social image that will appear when your site is shared on social media.
Finally, enter your Google Analytics ID, to track your site’s activity.
When you’re finished, click SET to save all settings.
Optimizing your site's SEO
WeBee’s website building tool is SEO friendly and allows you to promote your website easily.
To optimize your site’s SEO in search engine results:
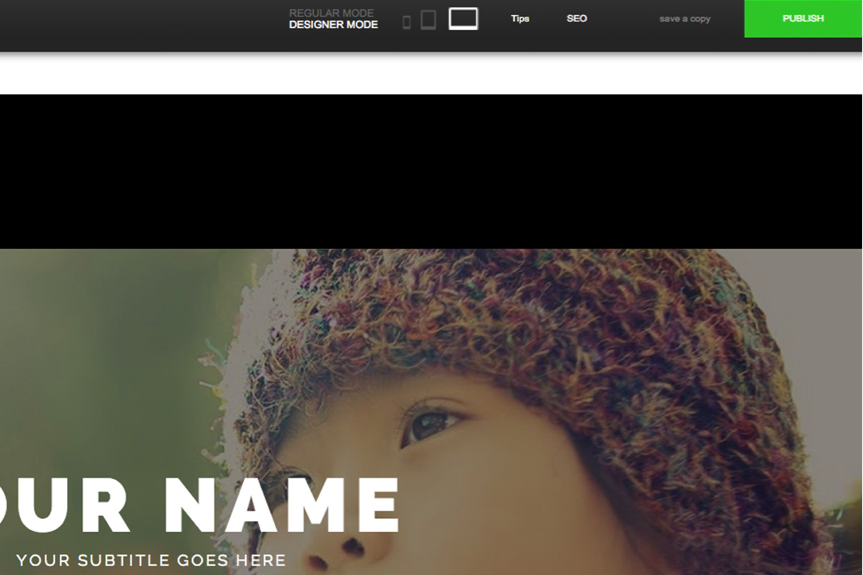
1) In the editor, click on SEO at the top bar.
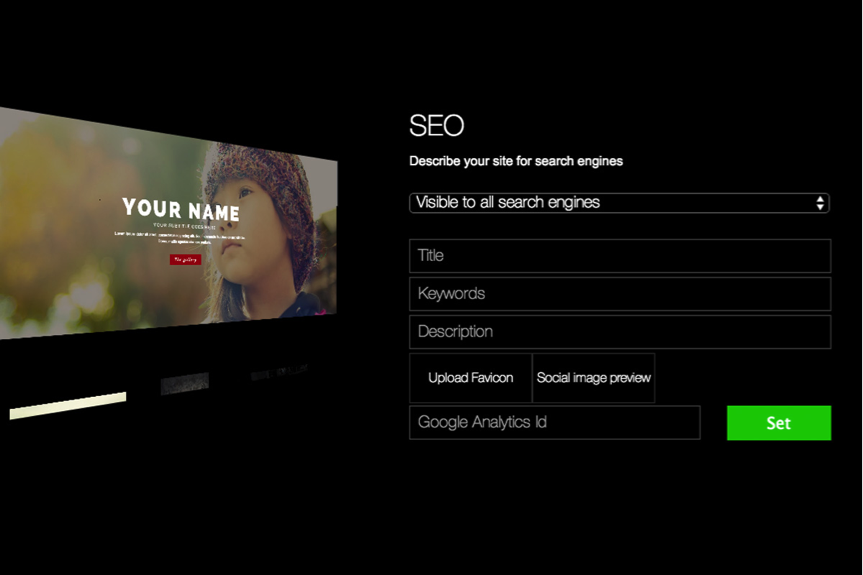
2) An SEO window will open. Insert your site's title, description and keywords and click Set.
The keywords are limited to about ten words since Google does an automatic crawl and will ignore more than ten words, making it ineffective.
Also make sure to use words that appear in the text in the body of your site, in order to get better search results on Google search.
3) Also in the SEO Window:
- Choose your site’s visibility on search engines
- Set your site’s favicon (the icon next to your site’s URL in the browser address bar)
- Add a social image preview image, to appear when you share your site’s URL in social media
- Add your Google Analytics ID
SEO Tips
A free URL will be hard to optimize. It is recommended to have your own domain and your brand or domain name should appear both in the title and the keywords. The keywords are the words you want to lead to your site when visitors search it on Google. It's also better to use words that are specific to your own site and avoid words like 'New York', 'mobile' and 'photographer'.
It is also recommended to have as many links leading to your domain as possible, including from your social media pages and accounts, relevant blogs, online magazines, etc.
Our internal SEO system is a super strong one and sites built on it are usually first in searches. However, this is a process that may take a couple of weeks, depending on Google's indexing so, in events where the keywords are very competitive, external SEO work may be suggested.
There are several online tools in which you can check the best words for your site and can run SEO checks in sites like http://www.seoworkers.com/tools/report.html
These sites provide information on your domain as well as suggestions on improving specific words and phrases.
That’s it.
How to open an email account
Any premium client can open free email accounts associated with their domain (like info@yourdomain.com).
if you purchased your domain from us, no need to do this - we will set the email up for you, just send us an email.
To open an email account, follow these steps -
----------
Step 1:
----------
Go to zoho.com/mail/ and click on GET STARTED.

Step 2 - Creating your email addresses:
--------------------------------------------------------
Click again on GET STARTED to create your Zoho account.

After choosing the email package you want, finish creating your account.

Some changes need to be made in the domain's DNS records in your registrar account (where you bought the domain).
Verify the ownership of the domain by adding a CNAME into your domain's DNS.
• This is an example of the CNAME record you'll see in Zoho mail setup:

Log into your domain's DNS control panel to add the CNAME record:
1. In your cPanel, navigate to your DNS Zone Editor
2. Enter the CNAME record received from Zoho.
3. Return to the Zoho's email setup window, and click 'Verify'. Do not log out of your registrar account just yet.
Continue with the setup steps until you reach the 'Change MX Records' step.
Step 4 - Changing the MX Records:
-------------------------------------------------
In your domain's DNS control panel:
1. Locate the MX entry panel.
2. Delete all existing MX entry records (Important: only Zoho's MX records should be there)
4. Enter the following entries and save the changes:

Step 5: Log in to your email account:
---------------------------------------------------
Sign in to your email account through https://www.zoho.com/mail/login.html.
Connecting an Existing Domain
To connect an existing domain:
1. Hover over PUBLISH (right-hand corner of the editor page)
2. Click ‘connect an existing domain’
3. Enter your domain (only the naked domain - yourdomain.com)
4. Connecting your existing domain also requires changing the DNS Records in your registrar so that the domain will point to our servers and to your new site.
To connect your domain to our servers:
1. Log in to your registrar account
The registrar is where you originally purchased the domain. If you don't remember who your registrar is, you can use whois.net to find out.
2. Locate the Control Panel or Domain Manager of your domain in your registrar account.
The control panel allows you to change the DNS records from the default ones provided by the registrar.
Different registrars may have different control panel layouts and other names for it as well. You might find it under 'DNS Manager' or 'Domain Manager".
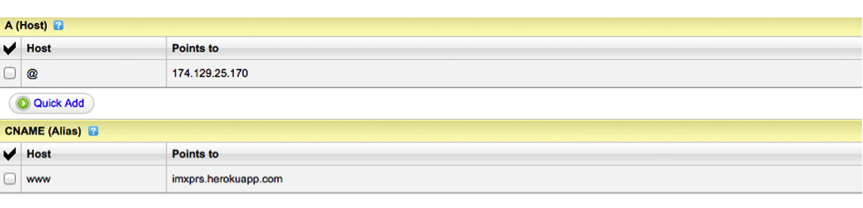
3. In your registrar's Control Panel, change the A record and the CNAME:
Add an empty (@) A record, with the value of 34.96.116.138
Add a 'www' CNAME, with the value of im-router-service.com
(If there are previous A records in your DNS settings - make sure to delete them).
----------------------------------------------------------
A record - Host --> @ (empty) points to --> 34.96.116.138
CNAME - Host --> WWW points to --> im-router-service.com
----------------------------------------------------------
Make sure to SAVE these changes.
I followed the steps and my site isn't up, what should I do?:
1) DNS error: It may take up to 24 hours for these changes to propagate worldwide. You can track your changes here.
2) Heroku error - "No such application": Read this post.
3) Error - "This domain is not properly configured in our system": Please re-connect your domain through the editor according to the above instructions.
Resources to change A & CNAME records on different domain registrars:
Godaddy:
Changing A records - https://support.godaddy.com/help/article/680/managing-dns-for-your-domain-names (here's a video on how to do it - https://www.youtube.com/watch?v=QNklh54mK7A)
Changing CNAME - https://support.google.com/a/answer/47610?hl=en
NameCheap:
Changing A records - https://www.namecheap.com/support/knowledgebase/article.aspx/319/78/how-can-i-setup-an-a-address-record-for-my-domain
Changing CNAME - https://www.namecheap.com/support/knowledgebase/article.aspx/1031/2/demo-how-to-set-up-a-cname-record
Register.com:
Changing A records - http://www.register.com/customersupport/tutorials/update_ip.rcmx
Changing CNAME records - http://www.register.com/customersupport/tutorials/cname.rcmx
Network Solutions:
Changing A records - http://www.networksolutions.com/support/a-records-ip-addresses-2/
Changing CNAME records - http://www.networksolutions.com/support/cname-records-host-aliases-2/
Name.com:
Changing A records - https://help.1and1.com/domains-c36931/manage-domains-c79822/dns-c37586/change-your-domain-s-ip-address-a-record-a599296.html
changing CNAME for subdomain www.yourdomain.com - https://help.1and1.com/domains-c36931/manage-domains-c79822/dns-c37586/enter-a-cname-for-your-subdomain-a643600.html
Publishing Your Site
To create an automatic redirection from http to https, please add the following code to your site’s Head-tag:
<script language="JavaScript"> if(window.location.protocol != 'https:') { location.href = location.href.replace("http://", "https://"); } >